As an Amazon Associate I earn from qualifying purchases.
Installing patio slabs can be a great way to create a beautiful outdoor space for relaxation and entertainment. However, the process can be daunting for those who are new to DIY projects. Fortunately, with the right tips and techniques, anyone can successfully install patio slabs and enjoy a stunning outdoor space.
Here are some tips for installing patio slabs:
1. Plan Ahead: Before starting the installation process, take the time to plan out your patio design. Consider the size and shape of the area, as well as any additional features you may want to incorporate, such as seating areas or fire pits. This will help you determine the amount of materials you will need and ensure that the project runs smoothly.
2. Prepare the Area: Proper preparation is key to a successful patio slab installation. Start by clearing the area of any debris, weeds, or existing patio materials. Next, level the ground using a shovel and a tamper to create a firm and even base for the slabs. Adding a layer of gravel or sand can help improve drainage and stability.
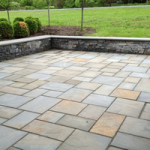
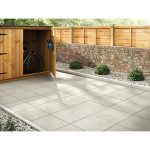
3. Choose the Right Materials: When selecting patio slabs, consider factors such as durability, style, and budget. Concrete slabs are a popular choice for their affordability and versatility, while natural stone slabs offer a more luxurious look. Take into account the climate in your area and choose materials that will withstand the elements.
4. Lay the Slabs Properly: When laying the patio slabs, start from one corner and work your way across the area. Use a level to ensure that each slab is even and properly aligned with the surrounding slabs. Leave a small gap between each slab to allow for expansion and contraction, and use spacers to maintain consistent spacing.
5. Secure the Slabs: To prevent the slabs from shifting or moving over time, it is important to secure them in place. Use a rubber mallet to tap the slabs into position and ensure they are firmly seated on the base. You can also use a concrete adhesive or mortar to bond the slabs together for added stability.
6. Finish with Sand or Grout: Once all the slabs are in place, fill the gaps between them with sand or grout to create a seamless and polished look. Sweep the sand or grout into the joints and then use a broom to remove any excess material. This will help lock the slabs in place and prevent weeds from growing between them.
By following these tips, you can successfully install patio slabs and create a beautiful outdoor space that you can enjoy for years to come. Remember to take your time, plan carefully, and seek help from professionals if needed. With a little patience and effort, you can transform your backyard into a relaxing and inviting retreat.
Amazon and the Amazon logo are trademarks of Amazon.com, Inc, or its affiliates.
 yonohomedesign.com Garden and Interior Design Ideas


